 An exterminator is a trained professional who specializes in managing, controlling, and eliminating pest infestations. Their role extends far beyond simply removing pests; they play a critical part in maintaining the health, safety, and structural integrity of homes and businesses. Left unchecked, pest infestations can lead to significant damage to properties and pose serious health risks. This makes exterminators an essential resource for both residential and commercial settings.
Responsibilities of an Exterminator
- Inspection: They assess the property to identify signs of pests, entry points, and the extent of the infestation.
- Identification: Properly identifying the type of pest is crucial for determining the appropriate treatment plan.
- Customized Treatment Plans: Exterminators tailor their approach based on factors such as the type of pest, size of infestation, and specific needs of the client.
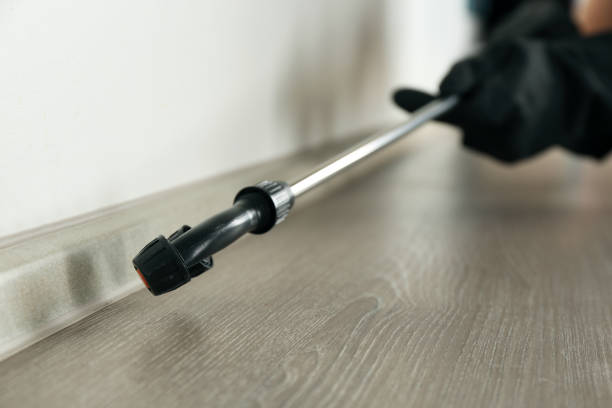
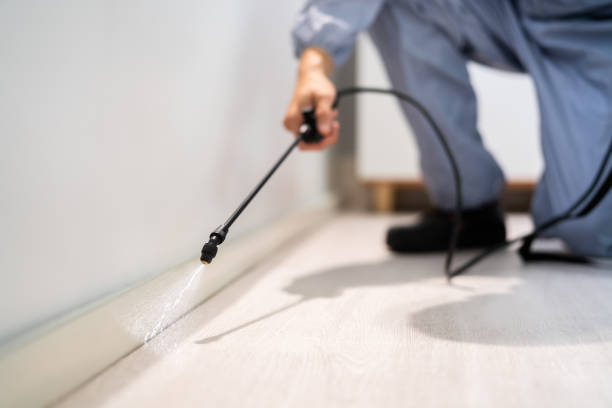
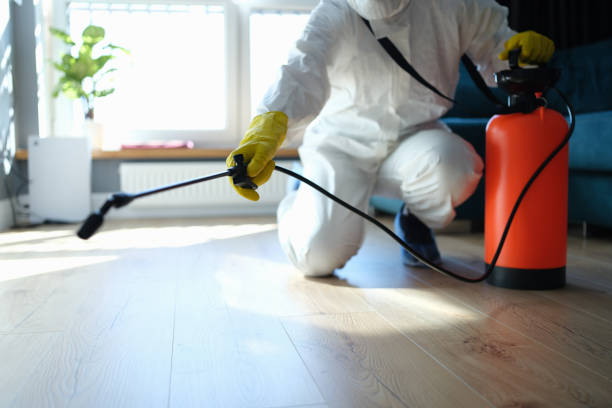
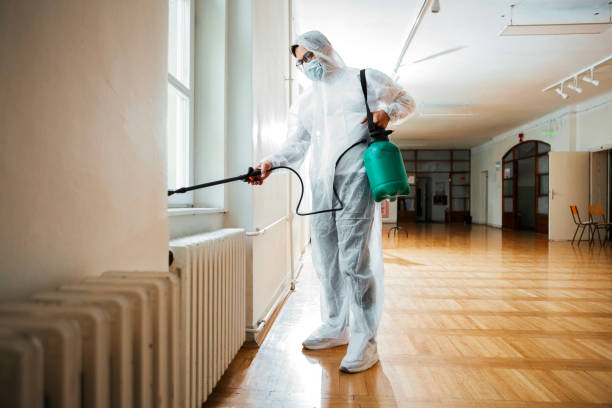
- Application of Treatments: Using safe yet effective tools and methods to eliminate or control pest presence while minimizing risk to humans, pets, and the environment.
- Education: Providing clients with information on preventative measures to reduce future infestations.
- Follow-Up Services: Ensuring long-term success by monitoring treated areas and re-treating if necessary.
Why Their Role is Crucial
- Pests such as rodents, cockroaches, or mosquitoes can carry diseases like hantavirus, salmonella, or West Nile virus.
- Allergens caused by pests like dust mites or cockroach droppings can trigger asthma or allergic reactions.
- Termites alone cause billions of dollars in damages globally each year by consuming wood structures.
- Rodents may chew through electrical wires or insulation materials.
- In restaurants or food storage facilities, pests like ants or flies can contaminate food supplies.
- Professional intervention helps ensure compliance with public health regulations.
- Attempting DIY treatments often leads to temporary fixes rather than long-term solutions.
- A licensed exterminator addresses root causes instead of surface symptoms.
The Importance of Professional Expertise
Exterminators undergo specialized training to understand pest biology and behavior—knowledge that homeowners often lack when attempting do-it-yourself solutions. Additionally, licensed professionals stay up-to-date with regulatory standards surrounding pesticide use for safe application within residential or commercial spaces.
| Key Aspects | DIY Approach | Professional Exterminator |
| Effectiveness | Limited | High |
| Long-Term Solutions | Rare | Yes |
| Safety | Risky | Trained for safe handling |
| Cost | May increase over time due to repeated attempts | Cost-effective in reducing repeat infestations |
By addressing both immediate problems and root causes efficiently while using environmentally conscious practices whenever possible, professional exterminators ensure properties remain pest-free without causing unnecessary harm.
Their expertise not only eliminates problems but also provides invaluable peace of mind—knowing your home or business is protected from future infestations under careful guidance from a skilled professional in pest control management strategies.
What Pests and Infestations Do Miami Gardens FL Pest Control Experts Handle to Protect Homes and Businesses
Exterminators serve a vital role in managing and eradicating various pests that can disrupt daily life, cause structural damage, or pose health risks. These professionals are trained to handle a wide array of infestations in both residential and commercial settings. Below is an overview of the most common pests exterminators manage and why controlling them is essential.
https://sites.google.com/view/pestinspectionmiamigardens/home
Top Pests Handled by an Exterminator Miami Gardens FL
- Why they’re a problem: Rodents chew on electrical wiring, insulation, and walls, leading to property damage. They also contaminate food supplies with their droppings, creating health hazards such as salmonella or hantavirus transmission.
- Control methods: Trapping systems, rodenticides (used carefully to avoid secondary poisoning), exclusion techniques, and sanitation recommendations.
- Why they’re a problem: Cockroaches carry bacteria like E. coli and Salmonella that can contaminate surfaces and food. They can also trigger allergies or asthma in sensitive individuals through their droppings or shed skins.
- Control methods: Baiting systems, insect growth regulators (IGRs), residual sprays, and sealing entry points.
- Why they’re a problem: Termites feed on cellulose materials such as wood structures, causing significant property damage over time if unnoticed or untreated.
- Control methods: Termiticide barriers (liquid treatments), baiting systems around the perimeter of buildings, fumigation for severe infestations.
- Common culprits: Carpenter ants (wood-damaging) or household ants (food contamination).
- Why they’re a problem: Ants invade kitchens in search of food sources while carpenter ants weaken wood structures by burrowing into them.
- Control methods: Gel baits for ingestion by colonies, perimeter barrier sprays for prevention.
- Why they’re a problem: Bed bugs bite humans during sleep, leaving itchy welts behind while being notoriously difficult to eradicate once established due to their rapid reproduction cycle.
- Control methods: Heat treatments, vacuuming affected areas thoroughly before applying insecticides specifically designed for bed bugs.
- Certain species become aggressive when provoked near nests on residential properties or outdoor business spaces.
- Specialty traps removal techniques require balance avoiding harming pollinators indirectly instead moved relocated related cases nearby agricultural dependence environmental stability indirectly beneficial important success matter optimizing action sequences properly sustainably integrated manner
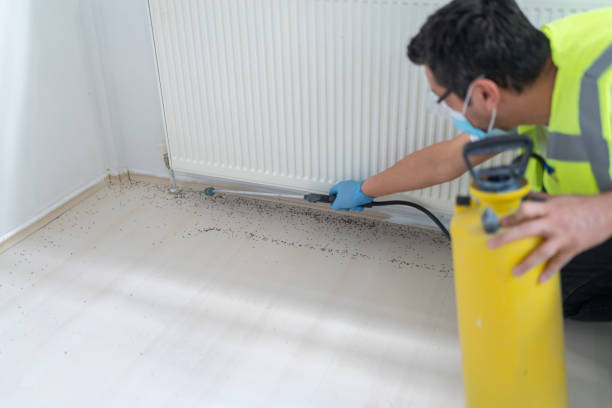
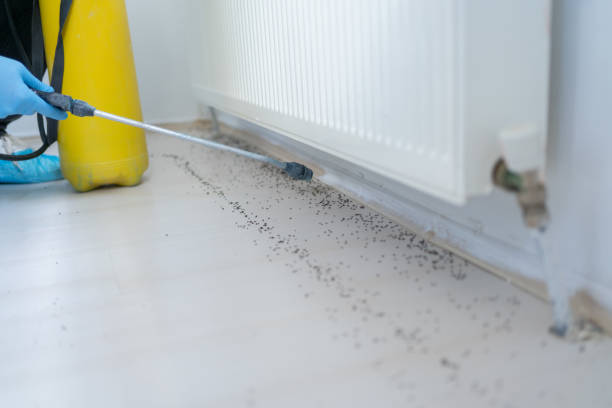
Effective Miami Gardens Pest Removal Methods Used by Professional Exterminators
1. Chemical Treatments
Chemical treatments are among the most widely used methods for managing pest infestations. These treatments often involve pesticides or insecticides that target specific pests without harming non-target organisms.
Types of Chemical Treatments:
– Residual Sprays: Applied in areas where pests frequent; they provide long-lasting protection as the chemicals remain active for extended periods.
– Baits and Gels: Used primarily for ants, cockroaches, and termites. These lure pests into consuming poisoned substances that eliminate entire colonies over time.
– Fogging or Fumigation: Effective for severe infestations in enclosed spaces; this involves dispersing chemicals in gaseous form to reach hidden pests.
| Chemical Method | Ideal For | Key Advantage |
| Residual Sprays | Ants, cockroaches | Long-lasting protection |
| Baits & Gels | Termites & household bugs | Targets whole colonies |
| Fogging/Fumigation | Bed bugs, termites | Reaches hard-to-access areas |
2. Physical Control Techniques
Physical control methods rely on barriers, traps, or mechanical means to capture or eliminate pests.
Key techniques:
– Trapping Systems: Live traps or snap traps are commonly used for rodents like mice and rats. Glue boards may also be used for smaller insects such as spiders or cockroaches. – Exclusion Practices: Sealing entry points (like gaps in walls, windows, or doors) ensures that pests cannot infiltrate spaces again after removal. – Heat Treatments: Particularly effective against bed bugs; heating infested areas beyond survivable temperatures eliminates pests without chemicals.
3. Biological Control Methods
Biological pest control involves using natural predators, pathogens, or parasites to manage pest populations effectively. This eco-friendly approach is particularly beneficial when dealing with agricultural pests but can also be adapted for residential use.
Examples include: – Introducing predatory insects like ladybugs to manage aphids. – Using nematodes (microscopic worms) against soil-based larvae. – Employing bacteria-based solutions like Bacillus thuringiensis (Bt) sprays.
4. Integrated Pest Management (IPM)
Professional exterminators often adopt an Integrated Pest Management strategy—a comprehensive method combining multiple tactics for long-term results with minimal environmental impact.
The core principles of IPM include: – Monitoring pest activity regularly. – Identifying pest species accurately before treatment. – Implementing prevention strategies such as sanitation improvements and structural repairs. – Using targeted chemical interventions only when necessary.
Benefits of IPM: This method emphasizes sustainable solutions by reducing reliance on chemical treatments while maintaining high efficacy levels over time.
Importance of Professional Expertise
While some DIY solutions exist for minor pest problems, professional exterminators possess the training required to assess infestation severity accurately while employing appropriate removal techniques safely and effectively.
Effective Pest Control Service Miami Gardens FL: Methods Used by Exterminators to Eliminate Pests
Professional exterminators utilize a range of methods to control and eliminate pests. Their expertise, coupled with the proper tools and techniques, ensures effective results. Below is an overview of some of the most common methods used by exterminators.
Inspection and Assessment
The first step in pest control involves a detailed inspection and assessment of the affected area. This process allows exterminators to:
– Identify the type of pest infestation (e.g., rodents, termites, cockroaches).
– Locate entry points, nests, or sources of infestation.
– Assess the severity of the problem to determine appropriate treatment methods.
This phase is crucial for tailoring a pest control plan that addresses specific needs effectively.
Chemical Treatments
Chemical pesticides are one of the most widely used methods in professional pest management. Exterminators apply these treatments carefully to target pests while minimizing harm to humans and pets. Types of chemical treatments include:
1. Insecticides – Used for controlling insects such as ants, cockroaches, and bedbugs.
2. Rodenticides – Designed specifically for rodent management.
3. Termiticides – Effective against termites damaging wooden structures.
Licensed professionals ensure proper application rates and follow safety guidelines to prevent environmental contamination.
Biological Control
In cases where environmentally friendly solutions are preferred, biological control may be employed. This technique involves introducing natural predators or parasites that target specific pests without harming other species or ecosystems. Examples include:
– Using beneficial nematodes against soil-dwelling insect larvae. – Introducing ladybugs to manage aphids in gardens or greenhouses.
Biological control provides a sustainable approach with reduced chemical reliance.
Mechanical Methods
For immediate relief from pests, mechanical methods are often employed alongside other strategies. These approaches focus on physical removal or exclusion techniques such as:
– Traps: Snap traps for rodents or adhesive traps for insects. – Barriers: Screens, mesh netting, or sealants to block entry points. – Vacuuming: High-powered vacuums can remove pests like bedbugs during infestations.
These mechanical tools can be highly effective when integrated into a comprehensive pest management plan.
Heat Treatments
Heat treatments have gained popularity due to their effectiveness in eliminating pests like bedbugs without chemicals. The process involves raising room temperatures above 120°F (49°C), which kills all stages of insect life—eggs, larvae, and adults—rapidly.
This method is particularly suitable for sensitive areas such as hotels or healthcare facilities where chemical use may be restricted.
Fumigation
| Pros | Cons |
| Covers extensive areas | Requires temporary evacuation |
| Reaches hidden colonies | Expensive treatment option |
| Ensures complete eradication | May need repeat applications |
Fumigation is commonly used against termites but requires professional handling due to its complexity and risks.
Integrated Pest Management (IPM) Approach
Modern exterminators often adopt an Integrated Pest Management (IPM) approach that combines multiple strategies for long-term results. The IPM framework emphasizes prevention alongside elimination by focusing on four main components:
1. Monitoring: Regular inspections to identify potential threats early. 2. Prevention: Sealing gaps, maintaining cleanliness, and removing food sources. 3. Control: Employing targeted treatments such as traps or baits. 4. Evaluation: Assessing outcomes periodically to refine strategies if necessary.
By using this holistic method, exterminators aim not only at current infestation removal but also at preventing future recurrences effectively.
These varied techniques highlight why professional extermination services remain essential in combating today’s diverse range of pest challenges safely and efficiently.
Warning Signs of a Potential Infestation That Require Immediate Professional Attention
Detecting the early warning signs of an infestation is critical for preventing extensive damage to your property and safeguarding health. Pests can multiply rapidly, making it essential to know when to seek professional help from an exterminator. Below are some common indicators that you may have a pest issue requiring immediate attention.
Physical Evidence of Pests
One of the easiest ways to identify an infestation is through visible signs of pests themselves. Keep an eye out for: – Live insects or rodents: Seeing pests during the day, especially nocturnal ones like cockroaches or mice, is a strong indication. – Dead pests: Finding multiple dead pests near windows, basements, or attics could signal a growing population. – Pest droppings: Rodent feces, insect frass (wood dust or droppings), or urine stains are clear indicators.
Strange Odors
Pests often leave behind strong, unpleasant odors. Be aware of smells such as: – Musty scents caused by nesting materials. – Ammonia-like odors from rodent urine. – Oily smells produced by cockroaches.
If these odors persist despite cleaning efforts, it might be time to call in a professional exterminator.
Unusual Noises
Pests tend to make noise during their activities. Pay attention to: – Scratching or scurrying sounds within walls or ceilings (often caused by rats or mice). – Buzzing noises from wasps, bees, or other flying insects trapped indoors. – Clicking sounds which may come from termites chewing through wood.
Noises are especially evident at night when many pests are most active.
Structural Damage
Structural issues in your home could also point to pest activity. Look for: | Type of Pest | Signs of Damage | |——————–|—————————————————–| | Termites | Hollow-sounding wood, buckling floors, mud tubes. | | Rodents | Chewed wires, gnawed furniture edges. | | Carpenter Ants | Holes in wooden structures with sawdust nearby. |
Ignoring structural damage can result in costly repairs down the line and should be addressed promptly.
Unexplained Allergies or Health Issues
If you or your family members experience sudden allergies or respiratory problems without any apparent cause, pests may be the culprit: – Cockroach droppings and shed skins can trigger asthma and allergies. – Dust mites and fleas often provoke skin irritations and rashes.
It’s crucial not to overlook these symptoms as they can worsen over time if left untreated.
Presence of Pest Nests
Discovering nests is a definitive sign that pests have made themselves at home on your property. Common areas where nests may be found include: – Attics and basements. – Wall cavities and crawl spaces. – Outdoor locations like sheds and garages.
Pest nests often grow quickly if unchecked and allow infestations to intensify further.
When It’s Time To Call a Professional
If you notice any combination of these warning signs in your home or workplace, contacting an experienced exterminator is essential. Delaying action gives pests more time to spread throughout your property, increasing potential harm to health and structures alike. An exterminator will assess the extent of the infestation, recommend tailored solutions, and restore peace of mind efficiently.
- Understanding the Role of a Pest Control Company in Miami Gardens FL and Why Their Services are Essential
- How to Prepare for a Visit from a Pest Control Company Miami Gardens FL
- How to Prepare Your Home for a Miami Gardens FL Pest Control Visit
- Comprehensive Insights Into What an Exterminator Miami Gardens FL Can Do for Professional Pest Control Services
- Essential Steps to Take After a Pest Control Company Miami Gardens FL Sprays for Roaches
- Preparing Your Home for Miami Gardens Pest Removal: A Complete Guide