
When hiring a professional exterminator, understanding what to expect during their visit can help you feel more comfortable and prepared. Pest control services often follow a structured process, ensuring that the infestation is effectively addressed. Below is an overview of what typically happens during an extermination appointment and how you can prepare your home for it.
What to Expect During the Visit
- The exterminator starts by conducting a thorough inspection of your property.
- They identify the type of pests present, locate entry points, and assess the severity of the infestation.
- This phase may also involve checking for nests, droppings, or structural damage caused by pests.
- After the inspection, the exterminator explains their findings.
- They outline a customized treatment plan designed to eliminate the specific pests in your home.
- You may also receive recommendations for follow-up treatments or preventive measures.
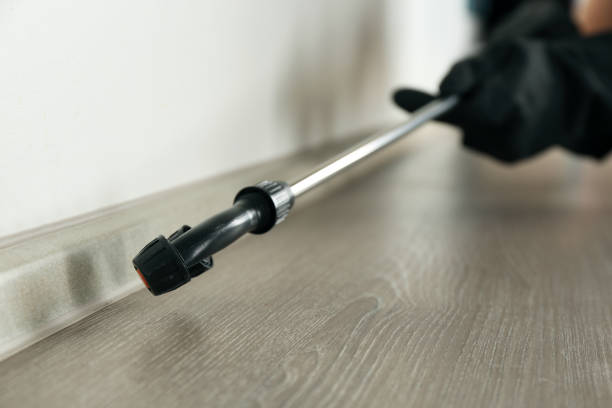
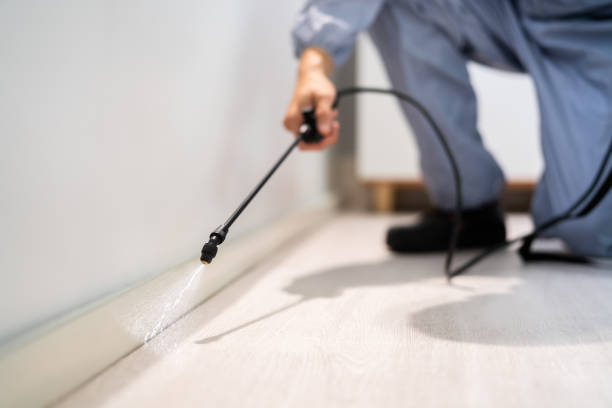
- The exterminator applies pest control solutions (e.g., sprays, baits, traps) in targeted areas.
- Depending on the type of pest and method used, treatments might include eco-friendly or chemical-based solutions.
- Some focus areas often include kitchens, basements, attics, and entry points like windows and doors.
- Once the treatment is complete, the expert provides advice on aftercare.
- You may be instructed to avoid cleaning treated areas or leave certain bait stations undisturbed for several days.
- In cases of severe infestations or persistent pests like termites or bed bugs, follow-up visits might be recommended.
- The technician will discuss timelines and additional steps required for long-term success.
How to Prepare Your Home for an Extermination Service
- Vacuum floors and carpets thoroughly to remove food crumbs that attract pests.
- Clear clutter from corners where insects or rodents may hide.
- Seal all food items in airtight containers before treatment begins.
- Remove fresh fruits from countertops or visible surfaces in kitchens.
- Move furniture away from walls so technicians can access baseboards and hard-to-reach areas.
- Clear storage spaces like under sinks where pests commonly reside.
- Place toys, stuffed animals, and other personal items in storage bins or plastic bags to prevent exposure to chemicals.
- Keep pets away from treated areas during service.
- Arrange temporary accommodations if required for sensitive animals such as birds or reptiles.
- Notify your exterminator if anyone in your household has allergies or sensitivities that could be triggered by certain chemicals used during treatment.
| Preparation Checklist | ✔ |
| Clean floors and surfaces | ✔ |
| Move furniture if necessary | ✔ |
| Secure food items | ✔ |
| Protect children’s belongings | ✔ |
| Arrange care for pets | ✔ |
By following these steps and understanding what occurs during a professional visit, you can ensure that both you and your home are ready for efficient pest control services while minimizing disruption to daily life. Preparing adequately not only improves outcomes but also helps prevent re-infestations in the future.
How to Effectively Prepare Your Home for an Exterminator Miami Gardens FL Service
Proper preparation before an extermination service is crucial for its success. Taking the right steps ensures that the pest control methods applied by professionals are effective and that your home remains safe during and after the treatment. Below is a guide to help you effectively prepare your home for an extermination service.
1. Communicate With Your Pest Control Provider
- Speak with the exterminator beforehand to understand the specific type of treatment being applied.
- Confirm whether any special preparations are necessary based on the type of pests being targeted (e.g., bed bugs, termites, cockroaches).
- Ask about any safety precautions or post-treatment restrictions you should be aware of.
2. General Cleaning and Decluttering
- Vacuum floors, carpets, and upholstery: This helps remove dirt, debris, and some pests like fleas or bed bugs.
- Eliminate clutter: Move furniture away from walls to provide clear access to baseboards, corners, and hidden areas.
- Clear countertops: Remove all food items, small appliances, and utensils from kitchen counters to allow treatment in food preparation areas.
| Area | Preparation Steps |
| Kitchen | Empty cabinets; seal food |
| Living Areas | Move furniture; declutter |
| Bedrooms | Strip bedding; move items |
3. Protect Food Items and Utensils
- Store all perishable food items in sealed containers or remove them from your home temporarily.
- Cover dishes, pots, pans, and utensils with plastic wrap or place them in cabinets that will not be treated.
- For refrigerator-stored items, ensure they remain sealed.
4. Focus on Specific Pest Preparation Needs
- For Bed Bugs: Launder sheets, pillowcases, curtains, and other fabric at high temperatures before treatment begins. Place clean items in sealed plastic bags until after service completion.
- For Cockroaches: Empty pantry shelves entirely if treating for kitchen-inhabiting roaches; dispose of old paper products such as cardboard boxes where roaches often nest.
- For Rodents: Identify entry points around doors or windows where technicians may use traps or sealants.
5. Plan for Pet Safety
- Arrange temporary relocation for pets during chemical treatments (especially birds or reptiles).
- Remove pet bedding, toys, food bowls from treated areas beforehand.
6. Address Exterior Areas
- Trim overgrown vegetation near foundations/patio doorways preventing insect entry pathways.
Tips for Preparing Your Home for Miami Gardens Pest Removal Services
Proper preparation is key to ensuring the success of pest control treatments. Taking the right steps before an exterminator arrives can help them work efficiently and maximize the effectiveness of the treatment. Here’s a detailed guide on how to prepare your home prior to a professional extermination service.
Declutter and Clean Key Areas
Pests thrive in cluttered areas, making it important to remove obstructions and debris that may give them shelter or allow pests to evade treatment.
– Clear floors: Remove toys, shoes, or other objects on the floor, especially near walls or corners.
– Organize closets: Clear out items stored near baseboards, where pests often hide or nest. – Vacuum carpets and rugs: This helps eliminate pest eggs, droppings, or food crumbs that may attract insects or rodents. – Wipe down surfaces: Ensure countertops, sinks, and tables are clean to remove food residue.
Protect Food Items and Utensils
Exterminators use chemicals that may linger temporarily in your home. It’s essential to safeguard any consumables or kitchenware from contamination.
– Store all perishable food in airtight containers or remove it from the treatment area entirely.
– Cover utensils, dishes, cookware, and appliances with plastic sheeting or store them inside cabinets.
– If possible, relocate open pantry items like cereals and grains into sealed containers.
Pay Attention to Specific Pest Concerns
Preparation steps may vary depending on the type of pest infestation you’re dealing with:
– For cockroaches: Empty kitchen cabinets completely since these pests often hide in dark crevices near food sources.
– For bed bugs: Launder bedding, sheets, curtains, and clothing in hot water and dry them at high heat before treatment begins. Vacuum mattresses thoroughly and encase them if recommended by your exterminator. – For rodents: Identify entry points such as holes in walls or gaps under doors for sealing after treatment.
Create Accessibility for Exterminators
To enable pest control professionals to perform thorough inspections and treatments:
– Move furniture away from walls so exterminators can access baseboards where pests tend to gather. – Empty cabinets under sinks in kitchens and bathrooms so technicians can treat plumbing entry points. – Provide clear access to attics, basements, crawl spaces, or other areas where pests may nest.
Remove Pets from Treated Spaces
Pets should not be exposed to pesticides during application. Take these steps:
1. Relocate pets (including fish tanks) outside of the treatment area until it is safe for reentry. 2. Remove pet bedding and toys from areas being treated. 3. Consult your exterminator about when it is safe for pets to return post-treatment.
Communicate With Your Exterminator
Before your scheduled service:
– Ask if there are specific preparation steps unique to your home’s layout or type of infestation. – Share information about any known pest activity (e.g., sightings of nests or droppings) so they can focus on problem areas.
Preparing a Checklist
| Task | Status |
| Declutter living spaces | [ ] Not Done |
| Clean floors & vacuum carpets | [ ] Not Done |
| Protect food & cover kitchenware | [ ] Not Done |
| Empty kitchen cabinets (Cockroach issue) | [ ] Not Done |
| Launder bedding (Bed bug issue) | [ ] Not Done |
| Move furniture away from walls | [ ] Not Done |
| Secure pets & relocate pet supplies | [ ] Not Done |
Proper preparation not only saves time but also ensures effective elimination of pests while reducing risks associated with pesticide exposure during treatment sessions.
What to Expect After Miami Gardens FL Pest Control Professionals Treat Your Home
After a professional exterminator has treated your home, there are several important steps and considerations to ensure the effectiveness of the treatment and maintain a pest-free environment. Understanding what to do post-treatment will help you maximize the benefits of pest control services.
Effective Pest Control Service Miami Gardens FL: What to Do After Treatment
- Follow the Exterminator’s Instructions
The exterminator will provide specific guidelines based on the type of treatment applied. These instructions may include: - Avoiding certain areas for a specified period.
- Ventilating your home if chemicals were used.
- Cleaning surfaces only after enough time has passed for the treatments to be effective.
- Wait Before Cleaning
Pesticides and other treatments may require time to settle and work effectively. Refrain from deep cleaning immediately after treatment, especially in areas where pesticides have been applied, such as baseboards or corners. - Monitor Pest Activity
You may still observe some pest activity in the days following treatment as pests are exposed to residual chemicals or bait systems begin taking effect. This is normal, but excessive activity beyond a week should be reported to your exterminator.
Common Post-Treatment Observations
| Observation | Explanation |
| Increased Pest Visibility | Some pests become more active before dying due to exposure to treatments. |
| Dead Insects or Rodents | You may find dead pests in treated areas as they succumb to the pesticides. |
| Continued Pest Presence | Residual infestations can occur; follow-up treatments may be necessary. |
Long-Term Maintenance Tips
- Seal Entry Points: Identify cracks, crevices, or gaps around windows, doors, and pipes that could act as entry points for pests and seal them with caulk or weatherproofing materials.
- Keep Food Stored Properly: Use airtight containers for food storage and avoid leaving crumbs or spills uncleaned.
- Maintain Cleanliness: Regularly vacuum carpets, rugs, and upholstered furniture where insects might hide.
- Inspect for Signs of Recurrence: Look out for pest droppings, nests, or damaged property that may indicate new activity.
When Follow-Up Treatments Are Needed
- Severe infestations that cannot be completely eradicated in one session.
- Structural challenges that allow pests continued access.
- Ineffective homeowner maintenance post-treatment leading to reinfestation.
Benefits of Communication with Your Exterminator
- Ask about safe cleaning practices post-treatment.
- Clarify timelines for returning to normal household routines.
- Report any pest resurgence immediately so adjustments can be made efficiently.
Taking these measures ensures not just short-term relief but also long-lasting protection against pests within your home environment.
Understanding Whether It Is Safe to Stay in Your Home After Pest Control Treatments
When scheduling a pest control treatment, one of the most common concerns homeowners face is whether it is safe to remain in their homes afterward. The answer largely depends on the type of pest control service, the chemicals used, and the specific guidelines provided by your exterminator. Below is a breakdown of factors that determine safety and actions you might need to take.
Factors Influencing Safety After Treatment
- Chemical Treatments: If synthetic pesticides are applied, it’s often recommended to vacate the area for a few hours or more depending on toxicity levels.
- Natural or Non-Toxic Solutions: Many pest control companies offer eco-friendly treatments that may not require you to leave your home.
- Fumigation: Whole-house fumigations (often used for termites) typically necessitate vacating your home for 24-72 hours.
- Ventilation Needs Proper ventilation is crucial after certain types of treatments. Some chemicals can leave behind residues or odors that dissipate faster with open windows or running fans.
- Localized treatments (e.g., a single room or outdoor spraying) may allow you to safely stay in unaffected areas of your home.
- Comprehensive indoor treatments might require leaving temporarily until all spaces are deemed safe.
- Pest Type The type of infestation being addressed—such as ants, cockroaches, bedbugs, or termites—can influence whether it’s necessary to leave your home due to the intensity and scope of treatment solutions.
Steps You Can Take for Safety
- Follow Exterminator Instructions: Always adhere strictly to any post-treatment guidelines provided by the professional. They will inform you about re-entry times and any cleaning precautions required.
- Check Label Information: Many pest control products have detailed safety instructions on their labels regarding human and pet exposure.
- Wait Time Recommendations: | Treatment Type | Recommended Wait Time | |——————————|———————————–| | General Chemical Sprays | 2–4 hours | | Fogging/Fumigation | 24–72 hours | | Eco-Friendly Solutions | Immediate re-entry (in some cases)|
Special Considerations for Sensitive Groups
- Children & Pets
Young children and animals are more sensitive to chemical exposure due to their lower body weight and increased proximity to treated surfaces like floors or furniture. Keep them out of treated areas for longer periods as recommended. - Allergies & Respiratory Conditions
Individuals with asthma, allergies, or other respiratory conditions should err on the side of caution by staying away until any lingering odors have dissipated completely.
Questions To Ask Your Exterminator
To ensure clarity before treatment begins, consider asking: – How long should I wait before returning? – Are treated areas safe for pets and children? – Is there anything I need to clean post-treatment? – Are there precautions for sensitive individuals?
By understanding these factors and taking appropriate precautions, homeowners can ensure their safety while effectively addressing pest problems in their living space without unnecessary risk.
The Importance of Scheduling Regular Termite Inspections Before Damage Occurs
Termites are often referred to as “silent destroyers” due to their ability to cause significant structural damage without immediate detection. Scheduling regular termite inspections is an essential step in maintaining the integrity and safety of your home or property. Below, we explore why these inspections are critical, what they involve, and how consistent monitoring can prevent costly repairs.
Why Regular Termite Inspections Are Critical
- Early Detection Saves Money: Termites can live undetected in walls, floors, and other areas of a structure for extended periods. Regular inspections help identify infestations before they escalate into expensive repairs.
- Protecting Structural Integrity: Termites feed on wood and cellulose materials, which can weaken the structural framework of a building over time. Early detection prevents dangerous deterioration.
- Preventing Long-Term Infestations: Once termites establish a colony on your property, they can multiply rapidly. Annual or biannual inspections help catch infestations during the early stages when treatment options are less invasive.
What Happens During a Professional Termite Inspection?
A professional termite inspection typically follows a systematic approach to assess your home’s vulnerability to termites and identify any existing activity.
- Inspecting the foundation for mud tubes (a common sign of subterranean termites).
- Checking wooden structures around the home (fences, decks) for damage or signs of infestation.
- Assessing areas where wood meets soil—a high-risk zone for termite entry.
- Examining baseboards, wooden flooring, window frames, and ceilings for visible damage or hollow sounds when tapped.
- Using advanced tools like moisture meters or thermal imaging cameras to detect hidden colonies behind walls.
- Looking for discarded wings or frass (termite droppings) that indicate active termites in your space.
- Detailed Report:
After completing the inspection, professionals provide a detailed report outlining their findings and recommending treatment options if necessary.
Recommended Frequency for Termite Inspections
| Property Type | Inspection Frequency | Notes |
| Residential Homes | Annually | Necessary even if there’s no history of infestation. |
| Homes with History | Every 6 months | Increased frequency helps monitor recurrence risks. |
| Commercial Properties | Biannually | Especially crucial for buildings with large wooden frameworks. |
How Regular Inspections Prevent Expensive Repairs
- Detecting termites early reduces damages that could cost thousands in repair bills.
- Professionals may offer preventive treatments like soil barriers or baiting systems during inspections.
- Regular checks ensure small issues don’t escalate into full-blown infestations requiring fumigation or extensive reconstruction.
Proactive Steps Between Inspections
- Store firewood at least 20 feet from your house and off the ground.
- Repair leaks promptly since moist environments attract termites.
- Maintain proper ventilation in basements and crawl spaces to reduce humidity levels.
- Avoid stacking mulch directly against your home’s foundation.
By committing to routine termite inspections and adopting preventive practices, you can protect your property from costly damage while ensuring long-term peace of mind regarding pest control concerns.
The Importance of Scheduling Regular Termite Inspections Before Damage Occurs
Termites are among the most destructive pests to homes and buildings, causing billions of dollars in damage annually. These silent invaders can go unnoticed for years, all the while compromising the structural integrity of your property. Scheduling regular termite inspections is a proactive approach to protecting your investment and minimizing potential risks.
Why Regular Termite Inspections Are Essential
- Regular inspections can identify termite infestations early, before they cause significant structural damage to your home or building.
- Early detection allows for prompt treatment, which is often more cost-effective and less invasive.
- A termite infestation can negatively affect the resale value of your property. Demonstrating proof of regular inspections reassures potential buyers that the property has been well-maintained.
- Some homeowner insurance policies or local regulations may require periodic pest or termite inspections to ensure compliance and coverage eligibility.
- Repairing damage caused by termites can be expensive, involving structural fixes that might require extensive renovation work.
- Preventative measures through regular inspections can save thousands in repair costs.
Recommended Frequency for Termite Inspections
| Risk Factor | Recommended Inspection Frequency |
| High-risk areas (warm/humid climates) | Every 6 months |
| History of previous infestations | Every 6 months |
| New construction homes | Annually until proven termite-free |
| Homes surrounded by dense vegetation | Annually |
What Happens During a Termite Inspection?
- Examine key areas like wooden structures, foundations, basements, crawl spaces, attics, and exterior walls.
- Look for signs such as mud tubes (used by termites to travel), discarded wings near windows or doors, hollow-sounding wood when tapped, and visible damage.
- Assess moisture levels since damp environments are conducive to termites.
- Provide a detailed report on findings along with recommendations for treatment if necessary.
Signs You Might Need an Immediate Inspection
- Unexplained cracks in walls or ceilings.
- Piles of what appear to be sawdust near wooden structures.
- Clicking sounds within walls (a potential indicator of termites eating wood).
- Swarmers (winged termites) inside or around your property.
Steps You Can Take Between Inspections
- Eliminate excess moisture around your home by fixing leaks promptly.
- Keep firewood stored at least 20 feet away from the house.
- Seal cracks in foundations and walls to deny easy entry points for pests.
- Trim vegetation so it doesn’t touch the home’s exterior structure.
Regular termite inspections should not be overlooked as part of routine maintenance for your property. They offer peace of mind while safeguarding against one of the most damaging pests you could encounter as a homeowner or property manager.
- Understanding the Role of a Pest Control Company in Miami Gardens FL and Why Their Services are Essential
- How to Prepare for a Visit from a Pest Control Company Miami Gardens FL
- How to Prepare Your Home for a Miami Gardens FL Pest Control Visit
- Comprehensive Insights Into What an Exterminator Miami Gardens FL Can Do for Professional Pest Control Services
- Essential Steps to Take After a Pest Control Company Miami Gardens FL Sprays for Roaches
- Preparing Your Home for Miami Gardens Pest Removal: A Complete Guide